Hi! I'm Katie from MiaMoo Designs. I am so excited and flattered that Miss CJ invited me to be a guest blogger of her FABULOUS blog. I have two beautiful little girls named Mia and Hayden. I started MiaMoo Designs when my Mia was 2. I LOVE all things crafty. I mostly make hair accessories, dresses/skirts for my girls, and chunky necklaces to go with their outfits. I've been lucky enough to have others like what I do, so I can make some money from home doing what I love :) I absolutely LOVE doing trades with people I've met through blogging, and I'm always up for a new project. I have some fun projects and tutorials to share with you today. Ok, let's get started! With Valentine's Day around the corner, I think these felt candy hearts are in order!
I made these little cuties last Valentine's Day, and boy were they a hit! I played around with the embroidery stitches to see which I liked best. The pink one is the blanket stitch, I did that one first, and decided it wasn't my fave for this project, so I just did the basic whip stitch and liked that better. At the time, I wasn't planning on doing a tutorial, so I don't have pictures of the process, but I'll do my best to explain how I made these. Here is what I used:
Supplies Needed:
1. Felt in whatever color you would like you candy hearts to be
2. Scissors
3. A dark pink fine tip Sharpie marker
4. Embroidery floss in the colors you are using for your candy hearts
5. Embroidery needle (I forgot to take a picture of that too)
6. Heart Stencil if you don't want to make your own (I got mine at WalMart)
How to:
I cut out all my heart shapes from your stencil. (2 per color because you will be embroidering both sides together)
When I was done cutting out my hearts, I tied a knot at one end of my embroidery floss and threaded it through my embroidery needle.
I placed the two hearts together and started my embroidery stitch at the top of the heart, in the middle. You will want to push the needle through the backside so your knot isn't on the front to start. From there I did a basic whip stitch all the way around the heart (ie:go up from the back with the needle, pull through, then go back up through the back again...make sense?) Once I got back to the top of the heart where I started, I tied a knot on the back. Lastly, I used my pink Sharpie to write on each heart. Taduhhhh!!! So easy and so cute! Hope you can understand my tutorial, I've never done one. if you have any questions feel free to comment and leave your email address :)
Another fun project for Valentine's Day is my Valentine Heart Applique T-Shirt
I bought a red t-shirt at Walmart (I think it was around $3.50) and cut out three hearts out of felt. 1 Large white, 1 Medium pink, and 1 small red heart. Next I hand embroidered little x's around the edges of the red heart onto the pink one. I thought it would be cute to give each heart a different stitch design, so on the pink heart I did a whip stitch and on the white one just a regular straight stitch along the edges. I think it's easier to embroider the hearts to each other first-THEN embroider the largest heart to the T-shirt. All you need for this cute little Valentine Shirt is a scrap of white, pink, and red felt, pink embroidery floss, an embroidery needle, and a t-shirt. So easy and so ADORABLE! This year I made my girls Valentine's necklaces and bracelets for Heart Day :)

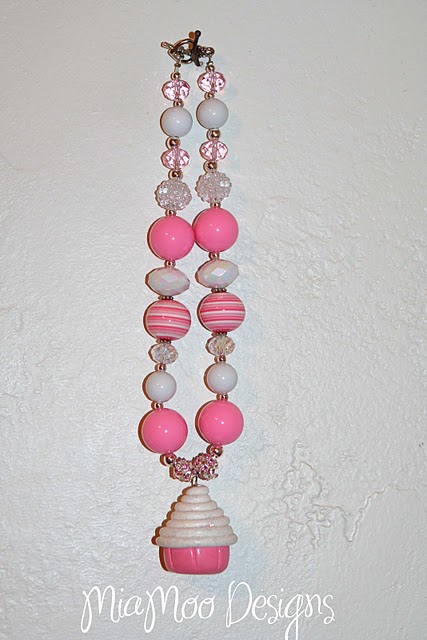
I just LOVE chunky necklaces on little girls, don't you? The problem is they are hard to find. I googled them, looked on etsy, and couldn't find anything I liked, so I decided to make my own! I've been on a jewelry making kick lately and can't seem to stop making these chunky necklaces. I branched out and started making my own cupcake beads out of sculpey clay and baking it in my oven. Who doesn't love cupcakes? These cupcake necklaces look especially sweet on toddlers and little girls. I think Mia has one to go with just about any outfit. Here are a few examples of some other necklaces I've make recently. If you would like to order anything, just leave me a comment on my blog with your email address and I'll get back to you and will email you a paypal invoice :)


Thanks so much for joining me today! I have other tutorials and fun projects that can be found on my blog :) I think you all feel the same way I do about Pink Tea. I'm going to really miss all of CJ's creativity and blog posts of all the amazing things she comes up with!


 Pin It


